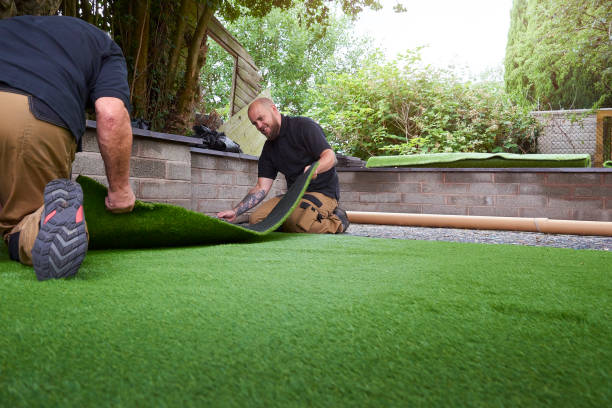
Artificial turf has become a go-to solution for homeowners, businesses, and athletic facilities seeking a low-maintenance, eco-friendly alternative to natural grass. Whether you’re planning a small backyard makeover or outfitting a sports field, a successful artificial turf install requires proper planning, the right tools, and a realistic budget.
In this comprehensive guide, we’ll walk you through everything you need to know about installing synthetic turf—including required equipment, average costs, installation timelines, and tips to ensure a smooth process.
Why Choose Artificial Turf?
Before diving into installation specifics, it’s worth considering why artificial grass is such a popular choice:
- Low Maintenance: No mowing, watering, or fertilizing
- Year-Round Greenery: Maintains a lush look in all seasons
- Durability: Designed to withstand foot traffic, pets, and extreme weather
- Eco-Friendly: Conserves water and reduces chemical usage
- Versatile Applications: Great for yards, rooftops, dog runs, play areas, and sports fields
Tools Needed for Artificial Turf Installation
Proper tools make all the difference when it comes to achieving a smooth, even, and secure turf surface. Here’s a list of essential tools you’ll need:
1. Turf Cutter or Sod Remover
Removes existing grass and weeds efficiently.
2. Shovel & Rake
Used for grading and leveling the soil base.
3. Plate Compactor
Essential for compacting the base layer and creating a stable foundation.
4. Landscape Fabric
Prevents weed growth beneath the turf.
5. Utility Knife or Turf Cutter Blade
To trim the turf edges precisely.
6. Turf Seaming Tape & Glue
Used to bond turf sections together for a seamless finish.
7. Turf Nails or Landscape Staples
Secure the turf to the base and prevent shifting.
8. Infill Spreader or Broom
Used to evenly distribute infill material like silica sand or rubber.
Optional Tools:
- Measuring tape
- Water roller
- Power brush (for final grooming)
Cost Breakdown of an Artificial Turf Install
Installation costs can vary based on project size, materials, and labor. Here’s a general overview:
| Installation Component | Average Cost (Per Sq. Ft.) |
|---|---|
| Artificial Turf Material | $2.00 – $6.00 |
| Base Materials (Gravel, Sand) | $1.00 – $2.00 |
| Labor (if hiring professionals) | $3.00 – $6.00 |
| Infill (Silica, Rubber, Cork) | $0.50 – $1.50 |
| Total Average Installed Price | $7.00 – $15.00 |
DIY Installations:
If you install the turf yourself, you can save significantly on labor costs, though you’ll still need to rent or purchase the proper tools. DIY installation usually ranges from $4.00 to $8.00 per square foot.
Pro Tip: Always consult with a trusted provider like Kansas City Turf to compare estimates and get expert recommendations tailored to your space.
Time Required for Artificial Turf Installation
The time it takes to complete an artificial turf install depends on the size of the area and whether it’s a DIY or professional job.
DIY Installation Timeline:
- Day 1: Site preparation (clearing grass, debris, leveling soil)
- Day 2: Laying base materials and compacting
- Day 3: Laying turf, trimming edges, seaming sections
- Day 4: Securing turf and spreading infill
Total Time: 3–5 days for a 500–1,000 sq. ft. area.
Professional Installation Timeline:
- Usually completed in 1–2 days for standard residential lawns.
- Larger or commercial projects may take 3–7 days, depending on complexity.
Step-by-Step Artificial Turf Install Process
Here’s a simplified breakdown of how professionals install artificial turf:
1. Measure and Plan
Map out the area, accounting for curves, slopes, and obstacles. Order slightly more turf than needed to allow for trimming.
2. Remove Existing Sod
Use a sod cutter to remove grass and topsoil down to 3–4 inches.
3. Prepare the Base
Fill the area with a base layer of crushed rock or decomposed granite, then compact it with a plate compactor.
4. Install Weed Barrier Fabric
Lay a landscape fabric to prevent weed growth and improve turf longevity.
5. Lay the Turf
Roll out the artificial grass in the same direction to prevent color variation. Trim the edges carefully.
6. Seam the Turf
Use seaming tape and glue for adjoining turf pieces, applying pressure to bond them together.
7. Secure the Turf
Anchor turf to the ground using nails or landscape staples every 4–6 inches along the edges and seams.
8. Add Infill and Brush
Spread infill evenly and brush the turf to help the fibers stand upright and enhance cushioning.
Mistakes to Avoid During Installation
- Poor base preparation: Can lead to drainage issues or uneven surfaces.
- Skipping the weed barrier: May result in unwanted growth beneath the turf.
- Misaligned turf sections: Can cause visible seams and a patchy look.
- Using the wrong infill: Affects durability, safety, and appearance.
- Improper trimming: Irregular cuts around corners or edges can reduce aesthetic quality.
Why Choose Professional Installation?
While DIY turf installation is possible, a professional artificial turf install ensures optimal results—especially for larger or high-traffic areas. Experts handle everything from drainage design to seam bonding and infill application with precision and speed.
Benefits of professional installation:
- Better warranties
- Correct grading and drainage setup
- Fewer installation errors
- Enhanced durability and safety
- Increased property value
Final Thoughts: Ready for Your Artificial Turf Transformation?
Installing artificial turf is an excellent way to upgrade your outdoor space with minimal maintenance and long-term cost savings. Whether you’re a homeowner seeking weekend curb appeal or a facility manager planning a sports field upgrade, understanding the installation process, costs, and tools involved is essential.
To ensure a flawless result, partner with trusted experts like Kansas City Turf. Their experienced team specializes in high-performance, eco-friendly artificial turf solutions tailored to your unique needs—so you can enjoy the perfect lawn without the upkeep.


